Today it smelled like spring outside here in Oregon. And when I went into my little greenhouse, I saw that my experiment was working, and I had hope for this year’s crops. ![IMG_1348[1]](https://forrealurbanfarming.wordpress.com/wp-content/uploads/2013/02/img_13481.jpg) Last summer some neighbors were replacing all of their windows, and gave us the old ones for making a greenhouse. Neither my husband nor I have much experience with construction, so we recruited some friends to help us in exchange for future garden starts from the greenhouse, and being fed while on the job. A beautiful greenhouse was created, and I was able to grow the promised starts. Now that it is spring and some of you may be in the mood for planting, I thought I’d share some lessons learned on greenhouse building from reclaimed materials. And I think I’ve also found a way to never have to water again using rotten wood. Yes, I’m serious. So here are Part I and Part II below.
Last summer some neighbors were replacing all of their windows, and gave us the old ones for making a greenhouse. Neither my husband nor I have much experience with construction, so we recruited some friends to help us in exchange for future garden starts from the greenhouse, and being fed while on the job. A beautiful greenhouse was created, and I was able to grow the promised starts. Now that it is spring and some of you may be in the mood for planting, I thought I’d share some lessons learned on greenhouse building from reclaimed materials. And I think I’ve also found a way to never have to water again using rotten wood. Yes, I’m serious. So here are Part I and Part II below.
Part I: Greenhouse Building

We wanted to build a greenhouse using only reclaimed materials (read: free). I decided I didn’t want to use electricity in the greenhouse both because I didn’t want the added heating cost and because I didn’t want to run an extension cord all the way out there (the only way there would be power). The inspiration for this greenhouse came from a wonderful book my friend Cathy Currier gave me, published in 1977, called “Build it Better Yourself”. It is over 900 pages long with detailed directions on how to make anything homesteady that you could desire. On page 830 it describes the “solar greenhouse”. (If you search online for the terms “passive solar greenhouse” you will find lots of info). From pages 831 and 839:
![IMG_1354[1]](https://forrealurbanfarming.wordpress.com/wp-content/uploads/2013/02/img_13541.jpg)
![IMG_1353[1]](https://forrealurbanfarming.wordpress.com/wp-content/uploads/2013/02/img_13531.jpg)
The basic idea is that the south facing side needs to be perpendicular to the angle of the sun’s rays. “The angle of your latitude is related to the angle of the sun at the summer solstice. At winter solstice the sun is 23 degrees lower in the sky” (p. 836). This book advocates for figuring out the angle at winter solstice, and making the angle of the roof perpendicular to that. Here in Oregon we are at about the 45th parallel, so we decided it was close enough to have the roof at about a 45 degree angle. The other major component of a passive solar greenhouse is insulation in the back to capture the heat. So all the sun is coming in the front of the greenhouse, and the back is retaining the heat. One recommended way to insulate the back is to fill black plastic buckets with water. The sun heats them during the day, and they slowly release the heat at night. The book also recommends making wooden frames covered with plastic that can be placed inside the clear, angled wall to provide an extra layer of insulation that can be removed when it is too hot. I also read somewhere about filling burlap bags with straw and laying them over the windows at night to add extra insulation, then removing them in the morning (way too much work for me). The overarching concept is to maximize heat absorbed and retained during the day, and minimize heat loss at night–and to also have some sort of venting system for when it gets too hot so you don’t bake your plants.
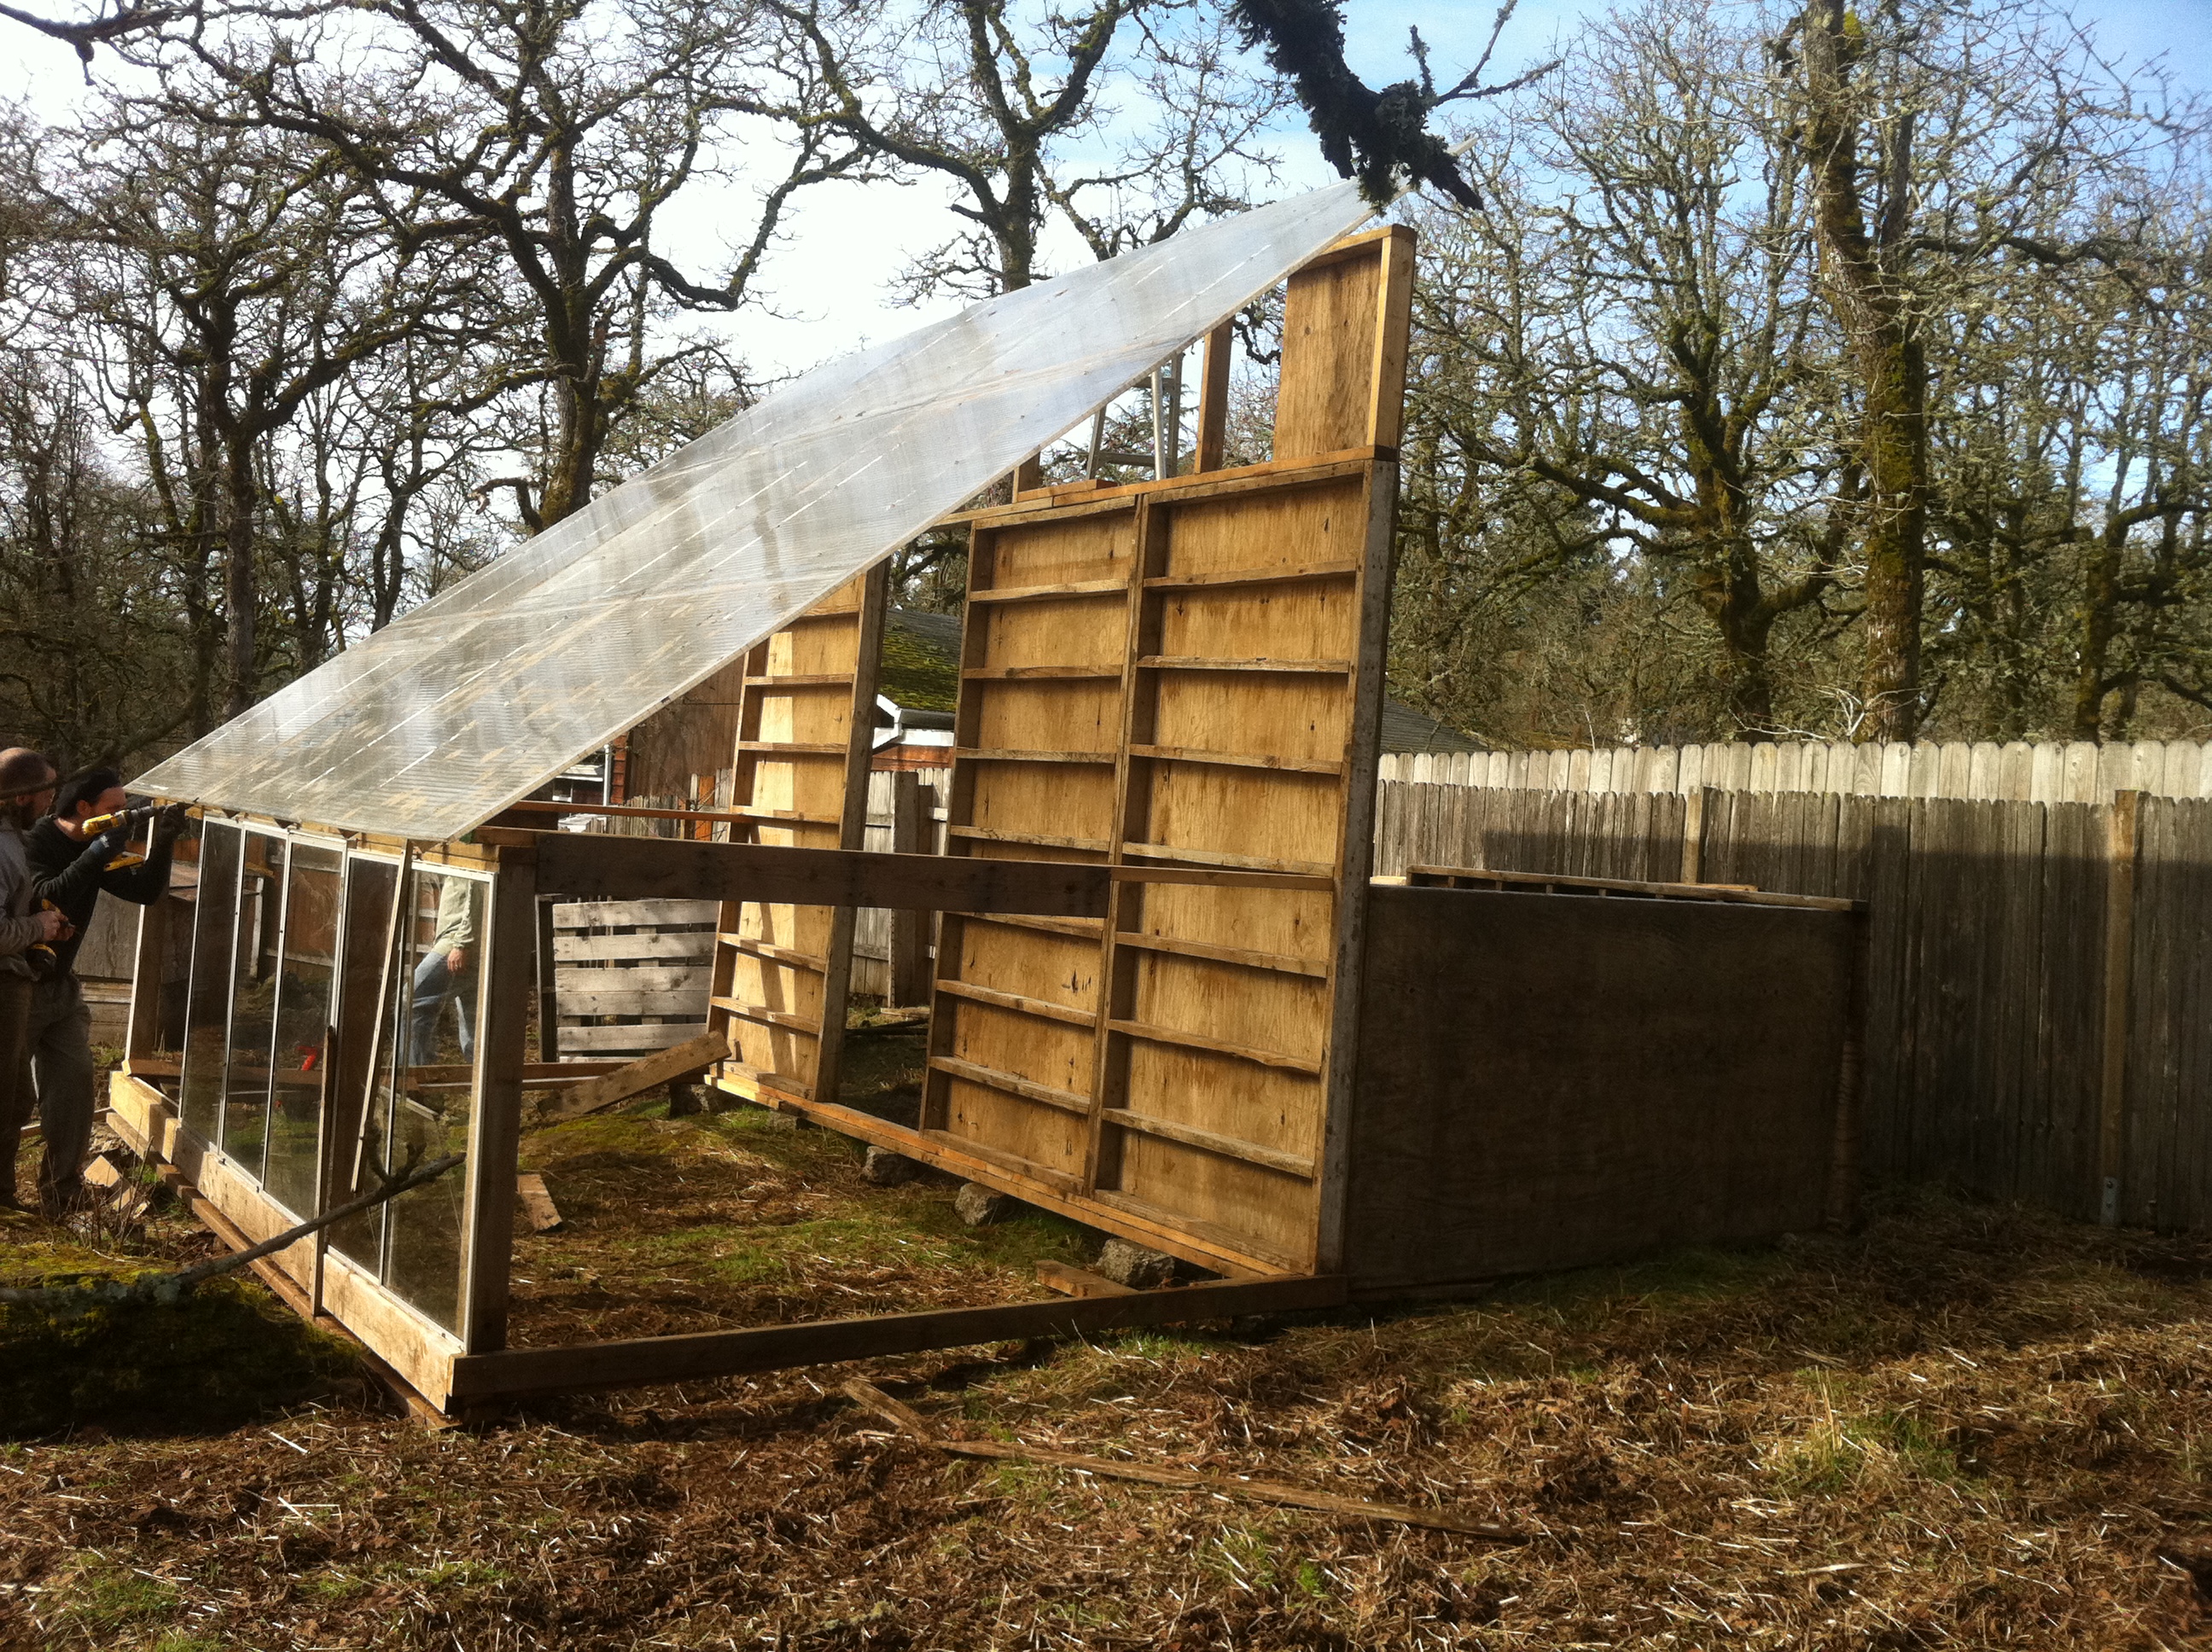
Here are pictures of my greenhouse being built:


In the back the three wood panels are old concrete forms that my husband pulled out of a dump pile. This made the back wall fairly simple. There is no foundation. They placed chunks of concrete on the ground, and moved them around and dug them down until the base was level, then made a simple frame. The base of the front is a row of windows framed in simply, but the way it is constructed they can be opened for ventilation if needed. The picture on the right is the construction of the 45 degree angle wall. My husband came across someone removing an awning downtown, and asked to have the old plastic panels. They just attached these to three simple wooden frames and lowered those over the top of the greenhouse. (Much of the genius of this design must be credited to our friend who helped us, Paithen Larkins).

I will re-insert the photo of the finished product here:
Here you can see that the sides are constructed of a sliding glass door on it’s side at the base. The triangle at the top is one window that can open surrounded by pieces of that plastic paneling cut to fit. Here is a picture of the inside:
![IMG_0003[1]](https://forrealurbanfarming.wordpress.com/wp-content/uploads/2013/02/img_00031.jpg)
This first year the greenhouse did OK. I never got around to adequately insulating the back wall. There were also lots of little gaps around the greenhouse that let in drafts that I have slowly been fixing throughout the year. But it worked to grow starts for the garden, and on chilly spring days I would sometimes sit in it to work, which was very luxurious. Then this summer our goat rammed her head through one of the windows, and we never fixed it until just last month. So I didn’t start any winter veggies, and it sat unused for several months.
About the time we fixed the window I also stumbled upon some brilliant information that will help me both heat the greenhouse and reduce how often I have to water it by a lot:
Part II: Hugelkultur
I was searching the internet for drip irrigation systems, trying to find a way to use less water, and to also have the watering be more automatic. But it all involved so much plastic and electricity and fancy gadgets. It just seemed that there had to be a simpler, more natural method. Then I found hugelkultur. Here is the website that will tell you everything you need to know.
The basic idea is that you make a huge pile of wood (up to six feet tall) and cover it with dirt, and plant on top of that. The wood acts like a giant sponge that absorbs water, and your plants put their roots into that and can absorb it. As the wood breaks down it also releases heat (like a compost pile) and warms the soil. It also releases a lot of nutrients that fertilize the plants. According to that website, if you build the beds six feet tall you will not have to water them all summer (after the second year). If they are two feet tall, you will only have to water once every three weeks (which sounds great to me! I can handle once every three weeks. Even once a week would be fine). You can also dig down into the ground and bury the wood rather than piling it on the surface, which reduces the height.
I also found this blog called “NW Edible Life”, and one post was called “Half-Ass Hugelkultur“. She threw a bunch of rotted logs on cardboard, and piled on chicken manure, compost, and other debris, then buried it. And here is the follow-up post 7 months later raving about how well it was working, including that just one month after she made the beds, soil temperatures were at 78 degrees (in Seattle, in April!).
So I thought: What if I make a hugelkultur bed inside my greenhouse? It will act like a giant heater, helping to warm the whole greenhouse. And within that bed, with the combination of warm soil below and greenhouse overhead, I should be able to grow stuff all winter. In the summer I should be able to grow amazing peppers and melons. So I tried it on New Year’s Day; great way to start the new year!
![IMG_1162[1]](https://forrealurbanfarming.wordpress.com/wp-content/uploads/2013/02/img_11621.jpg) I started by digging a long trench on the inside of the front windows, and filling it with cottonwood branches we happened to have around. (You don’t want to use Cedar or anything else that might resist breaking down).
I started by digging a long trench on the inside of the front windows, and filling it with cottonwood branches we happened to have around. (You don’t want to use Cedar or anything else that might resist breaking down).
![IMG_1164[1]](https://forrealurbanfarming.wordpress.com/wp-content/uploads/2013/02/img_11641.jpg)
I then laid down smaller branches on top of that, hoping they will break down more quickly and fill in the gaps.
![IMG_1166[1]](https://forrealurbanfarming.wordpress.com/wp-content/uploads/2013/02/img_11661.jpg)
On top of that I filled in a load of chicken litter (I use the deep litter method, so this should be partially composted and not burn my plants. These are pine shavings). I also added some scoops of decomposed compost to seed microbes into the mix and get everything breaking down. I then covered it all back over with the soil I’d dug out of the ditches. Then I soaked it with water to get it going.
![IMG_1168[1]](https://forrealurbanfarming.wordpress.com/wp-content/uploads/2013/02/img_11681.jpg)
I planted seeds the first week of January. We then had a cold spell where temperatures were below 32 degrees F for awhile. Since the composting hadn’t really gotten going yet, and my greenhouse doesn’t totally regulate the heat, it took about a month for things to start sprouting. But now they are growing really well! Here are some photos from today of baby kale (left) and swiss chard (right):
![IMG_1350[1]](https://forrealurbanfarming.wordpress.com/wp-content/uploads/2013/02/img_13501.jpg)
![IMG_1352[1]](https://forrealurbanfarming.wordpress.com/wp-content/uploads/2013/02/img_13521.jpg)
I only planted things that will tolerate cooler weather and a shorter photo period. Last week only the snap peas poked out of the ground. Then we were out of town for a week. When I checked today there were also carrots, kale, cilantro, lettuce, and endive that had sprouted!! I don’t have a soil thermometer, so I don’t know how much the hugelkultur is heating things up. But the little plants seem happy. Usually these seeds couldn’t be planted outside in the garden until March or April, so this gives me a two or three month jump on the growing season. If the ground really warms up by next winter, and I do a better job of insulating the greenhouse, I am hoping I will be able to grow food in there year round. I’ll let you know how it goes…..
And I also plan to make some hugelkultur raised beds outside. Why not do this under every new garden bed??
Update: To see how this technique is going, see this new post.

Congratulations! This is really awesome! I’m so impressed.
LikeLike
That greenhouse looks awesome! Thanks for the hugelkultur info — exactly what we were looking for! -FreeRangeQuest
LikeLike
Nice! I am soooo just a few steps behind you. I have been listening to the permies.com podcasts and learned about hugelkulture last year. And I got some windows from freecycle.com. But I don’t have the skills to build the greenhouse. I hope to get someone to help me with that later this Spring. I hadn’t put these two ideas together until I saw this post on facebook. I am an Oregonian too!
LikeLike
two things:
was the goat okay?
A hugel bed in a greehouse? You should get a genius award! That is so awesome! Happy growing, looking forward to updates 🙂
LikeLike